I’m still going strong in my Tunisian Crochet kick! I think what I enjoy most about Tunisian is that I still have a lot to learn. It keeps it exciting and fresh.
After showing on Instagram how to use a long tail cast on, I started to wonder what other knitting skills could be applied to Tunisian. You guys seemed to really love the long tail cast on, so I figured my readers would appreciate more crafty crossovers.

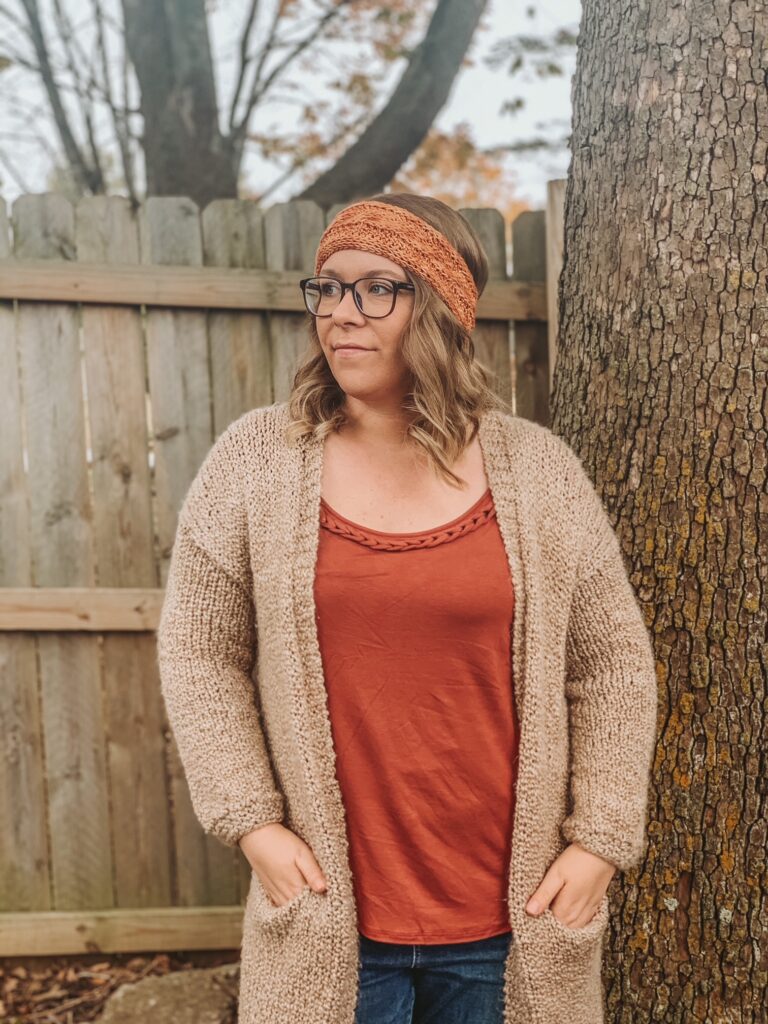
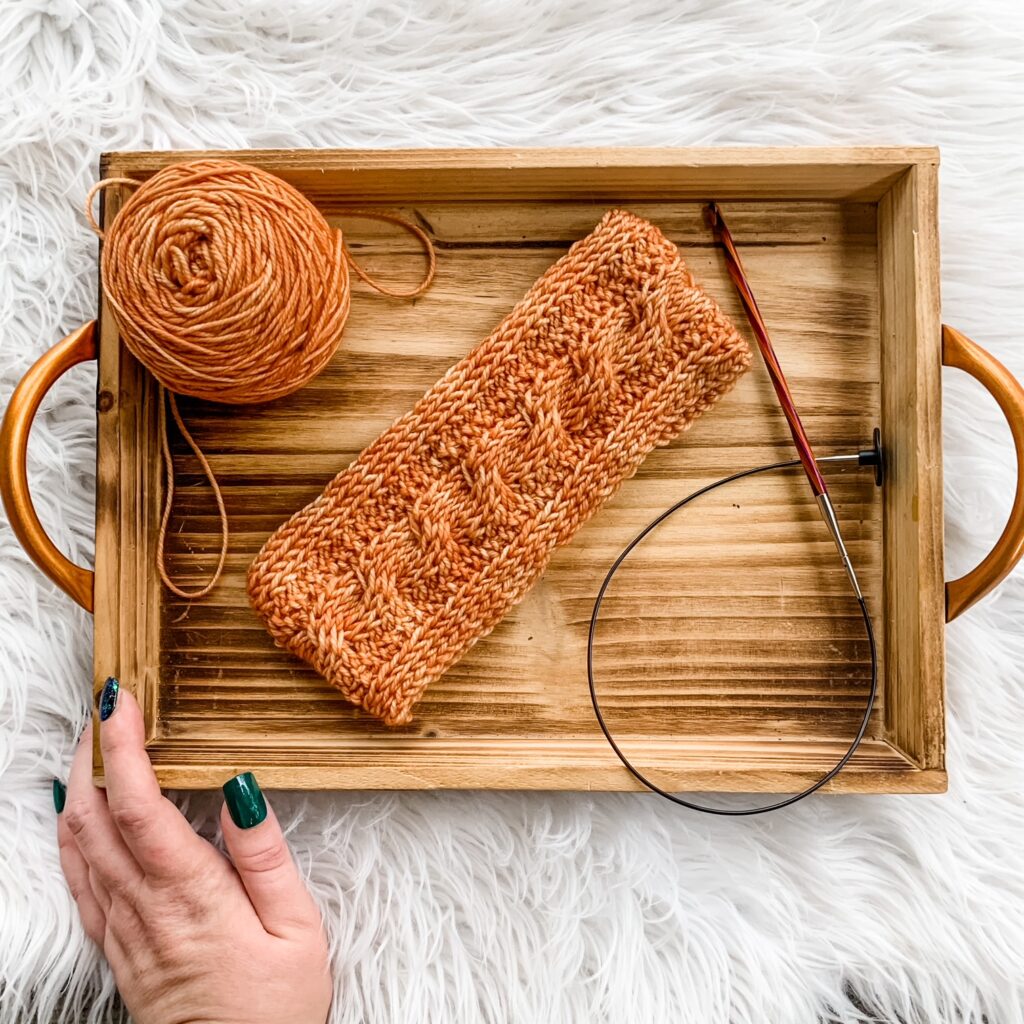
I immediately wondered if Tunisian cables could be done in the same way as knit cables. I started fiddling around with it, and guess what? They totally can! This was a very pleasant discovery! I absolutely love the look of knit cables, and once you get the hang of them – they are super easy to work.
Tunisian cables aren’t quite as squishy as knit cables, but they’re pretty close. Using the tks for the cable really mimics the look of a traditional knit cable. For this design I combined them with some tps to make them pop as much as possible.
The Technique
This pattern uses a 3/3 LC. This means it is a 3 x 3 cable (6 stitches total), and the cable crosses to the left. You will need a cable holder for this – or in a pinch you can use a spare crochet hook to hold your stitches.

3/3LC
A. Your cable twist will be worked over the center six sts.
B. Tks 3.
C. Transfer the 3 previously worked sts to cable needle, hold in front of work.
D. Tks next 3 sts.
E. Transfer 3 sts from cable needle to hook, making sure not to twist
F. (Not a part of 3/3LC, but the following row), be sure to work sts in their “new” order. The back sts should be worked before the front sts.
You may also enjoy these free patterns
Continue reading for the free pattern below, or pick up an ad free PDF on Ravelry. Your purchase of the ad free PDF helps me continue to provide free blog content.
Pattern Notes
Method Tunisian Crochet
Skill Level Intermediate
Hooks 5 mm Tunisian hook (US H), or size needed to meet gauge
Yarn Worsted weight, 75 – 90 yards
Other Cable holder, yarn needle, locking stitch marker, blocking pins and mat
Gauge 18 tks x 18 rows = 4” square
Gauge is not overly critical for this pattern, after a few rows your headband should be 3” wide.
Sizes One size (adult), with measurements given for other sizes
•Instructions are for one size headband, but you can easily adjust length for different ages, using the chart below.
•While not required, it may be helpful to mark your cable rows with a sm, to help you keep your place in the pattern repeat.
•Work a standard RetP after each row
•When working the RetP of your 3/3 LC rows, take care to not drop any stitches.
•When working the row immediately following the 3/3LC row, your six center stitches may appear to be “bunched up”. The first three stitches will be hidden behind the other three – take care to work your tks from right to left, with the “back” stitches worked first.
•Your cables will be more pronounced if you use a yarn with good stitch definition.
•To make with a bulky yarn, follow pattern as instructed and use a 6 mm hook.
| Size | Length (inches) |
| Toddler | 16 |
| Child | 17 |
| Teen | 18 |
| Adult | 19 |
Abbreviations
st(s) stitch(es)
ch chain
tps tunisan purl stitch
tks tunisian knit stitch
Fwp forward pass
RetP return pass
sm stitch marker
3/3 LC Tks 3, place sts on cable needle and hold in front of work, tks 3, then transfer 3 sts from cable needle to hook.
Pattern
Ch 16
Row 1: Pull up a loop in 2nd ch from hook and each ch across (16 loops across), complete your RetP.
Row 2: Tks 2, tps 2, tks 6, tps 2, tks 3.
Row 3: Repeat row 2.
Row 4: Tks 2, tps 2, 3/3LC, tps 2, tks 3.
Rows 5 – 8: Repeat row 2.
Repeat rows 4 – 8, ending on a row 5 repeat, until your piece measures 19”, or whatever length comfortably fits around your head, keeping in mind the fit should be snug.
Finishing:
Slst bind off, leaving a long tail. At this point, you may choose to block your headband using whichever method you prefer. After blocking, use the long tail to mattress stitch the bind off edge to your beginning edge. Weave in all ends.
Before you go…
You are welcome to sell finished items created with this pattern. I only ask that you credit Hooked Hazel with the original design. Do not use my photos to sell finished products. Do not copy, alter, or distribute this pattern.
I would appreciate your review on Etsy, Ravelry, or Instagram. Tag me in photos, and I may feature your project! Use the hashtags #hookedhazel and #elliotheadband to possibly be featured!