Do you like using new materials and techniques in your crochet? If so, this free crochet tutorial may be right up your alley!
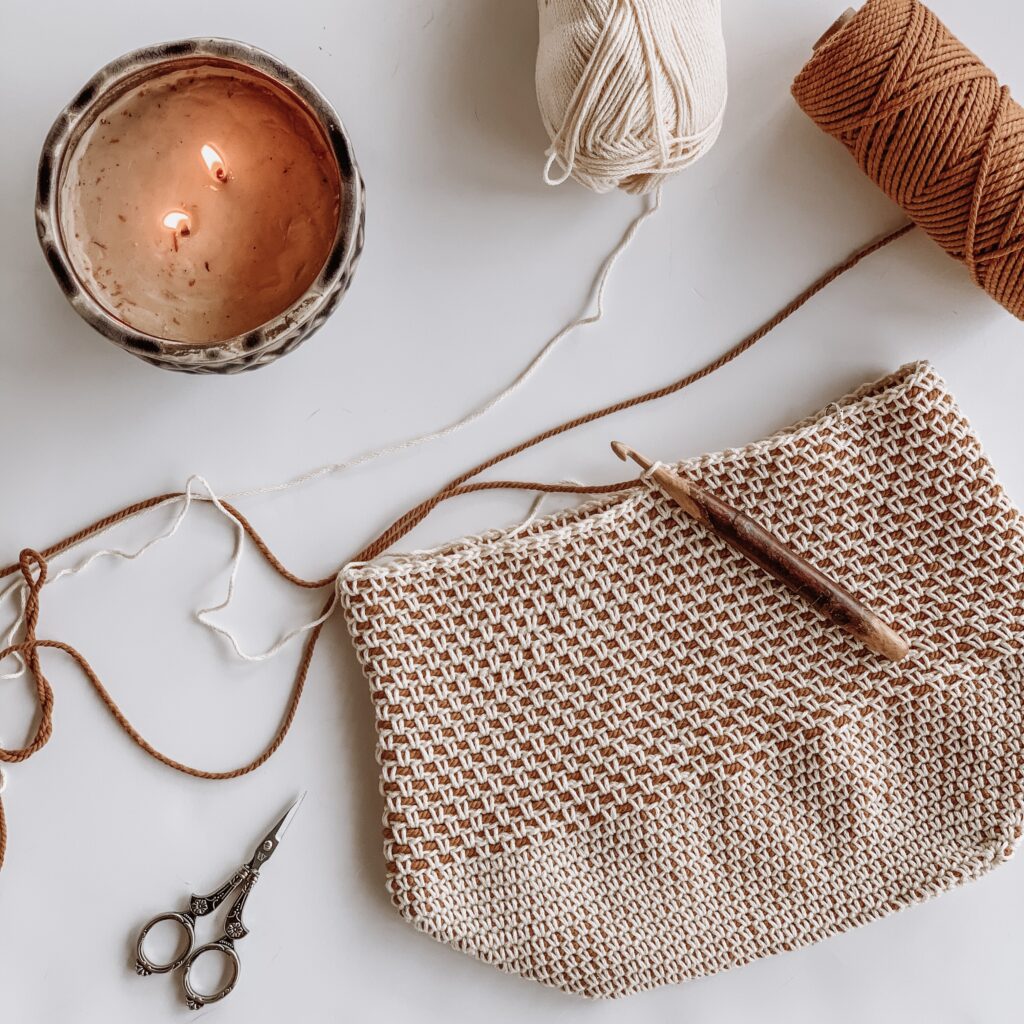
For the longest time, I’ve admired macrame. I love the texture of the cord used in those creations, and have been trying to think of a way to incorporate that into my crochet makes. I ordered some cotton cord from Amazon, and starting envisioning making a strong and sturdy bag with it. I really love how it turned out, and I hope you do too!


The cord I used for this project is 3mm cord. I chose the She Weave because it comes in several colors, is 100% cotton, and has plenty of yardage. I used brown for this tutorial, but it is also available in pink, purple, blue, and many more! The color combinations you could make for this bag are really endless!
In addition to the cotton cord needed for this project, you will also need some worsted weight yarn. I highly recommend Lion Brand 24/7 cotton. Like the cotton cord I used, it also comes in a wide variety of colors. For my sample I used Ecru, In addition to the extensive color selection, I also prefer this yarn because it is mercerized and very strong.
Now, let’s get on to the pattern! I hope you enjoy making this bag as much as I did!
Details/Notes
Method: Crochet
Skill Level: Advanced Beginner
Hooks 5 mm (US H) and 5.5 mm (US I), or size needed to meet gauge
Other Yarn needle, Stitch markers (3), one should be different from the others to mark the beginning of each round
Yarn: Lion Brand 24/7 Cotton or comparable worsted weight yarn, 300 yards
3mm cotton cord in contrasting color, 70 yards
Gauge 4” = 18 st in pattern
Abbreviations
st stitch
ch chain
slst slip stitch
sc single crochet
sk skip
sp space
sm stitch marker
Notes:
- This bag is worked in continuous rounds, meaning you will not slst and join your work at the end of a round unless instructed to do so.
- Use one stitch marker to mark the beginning of the round, and move this marker each round. The other two markers will be used in the base to mark the middle stitch in each increase.
- The body of the bag uses moss stitch, where your sc should always be worked into a ch sp.
Details/Notes
This bag is created by working sc around a length of cotton cord, as illustrated below.
Step 1: Insert your hook into the indicated stitch, holding the cotton cord above the stitch as shown in the first photo. Pull up a loop. You now have two loops on your hook, and the cotton cord is “contained” within the stitch (second photo).
Step 2: YO, pull through both loops to finish the sc.
Base
Note: For each round, when you complete a 3sc, mark the center of those 3 sts with a sm.
With smaller hook, ch 31.
Arrange cotton cord to now begin crocheting around it.
Round 1: Sc in the 2nd st from your hook and in each st until 1 st remains, 3sc in last st, rotate work and sc into the other side of the ch until 1 st remains, 2sc in final st. Mark your last st with your sm. Note: in round 1, your final st is actually the middle st in the 3sc increase. (64 sc)
Round 2: Sc in each st to your first sm, 3sc in marked st, sc in each st to next marker, 3 sc in marked st, sc in each st to end. (68 sc)
Round 3 – 13: Repeat round 2, join with slst to first st and fasten off. (112 sc)
Note: each increase round adds 4 sts.
Body
Switch to larger hook, and join yarn in your last marked stitch (center of 3sc). You will continue to work around your cord.
Round 1: *Sc 1, ch 1, sk 1*, repeat from * to * around. (56 sc, 56 ch sp)
Round 2: *Ch 1, sk 1, sc 1*, repeat from * to * around. (56 sc, 56 ch sp)
Round 3 – 28: Repeat rounds 1 -2. (56 sc, 56 ch sp)
Round 29: *Sc 1, ch 1, sk 1* 7 times, sc1, ch 3, sk 3, *sc 1, ch 1, sk 1* 11 times, sc 1, ch 3, sk 3, *sc 1, ch 1, sk 1* 14 times, sc 1, ch 3, sk 3, *sc 1, ch 1, sk 1* 11 times, sc 1, ch 3, sk 3, *sc 1, ch 1, sk 1* to end of round. (52 sc, 4 ch 3 sp, 52 ch 1 sp)
Round 30: *Ch 1, sk 1, sc 1* to first ch 3 sp, *sc 1, ch 1, sc 1* in ch 3sp, *ch 1, sk 1, sc 1* to next ch 3 sp, *sc 1, ch 1, sc 1* in ch 3 sp, *ch 1, sk 1, sc 1* to next ch 3 sp, *sc 1, ch 1, sc 1* in ch 3 sp, *ch 1, sk 1, sc 1* to next ch 3 sp, *sc 1, ch 1, sc 1* in ch 3 sp, *ch 1, sk 1, sc 1* to end. (56 sc, 56 ch sp)
Rounds 31 – 32: Repeat rounds 1 – 2. (56 sc, 56 ch sp)
Join final st with a slst to first st of round, fasten off and weave in ends.

Straps:
1. Cut 6 lengths of cord, approximately 70” each. Separate into two groups of 3.
2. Holding your three lengths together, fold them in half and tie a knot about 4” from the looped middle.
3. Fishtail braid your straps. Do this by separating your 6 strands into even groups of 3. Take the strand on the leftmost side, and cross over the other two on the left. Then, take the strand on the rightmost side and cross over the two on the right. Your original leftmost strand should now be on the inside of the right side, and vice versa. Continue in this fashion until approximately 7” of unworked cord remains.
4. Fasten the end in a knot, leaving 4” for a tassel.
5. With your bag lying flat, work one end of the now braided cord through each opening on one side of the purse.
6. Use a darning needle and yarn to sew the knot into place against the bag. Wrap with excess cord if desired and weave in ends.
7. Repeat for other side.
Before you go…
You are welcome to sell finished items created with this pattern. I only ask that you credit Hooked Hazel with the original design. Do not use my photos to sell finished products. Do not copy, alter, or distribute this pattern.
I would appreciate your review on Etsy, Ravelry, or Instagram. Tag me in photos, and I may feature your project! Use the hashtags #BlytheBag and #hookedhazel to possibly be featured!


