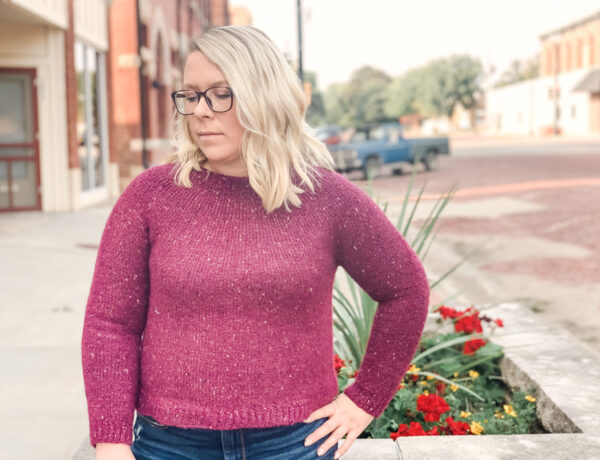
It’s sweater season! I love crocheting pullovers. They are so cozy, especially when I’m working from home and want to feel comfortable but also stylish enough for a zoom meeting or two. The Spruce Trail Pullover is perfect for wearing out too! It is loaded with fun texture, and worked side to side for a modern, flattering shape.
If you’ve never worked a sweater side to side, it’s a lot of fun! I find that sweaters crocheted this way do not stretch quite as much, which is important when you’re wearing them. They hold their shape nicely and don’t get saggy. For the Spruce Trail Pullover, I used one of my favorite stitches, the herringbone half double crochet. It’s a pretty speedy stitch that looks a little “fancier” than traditional half double crochet.
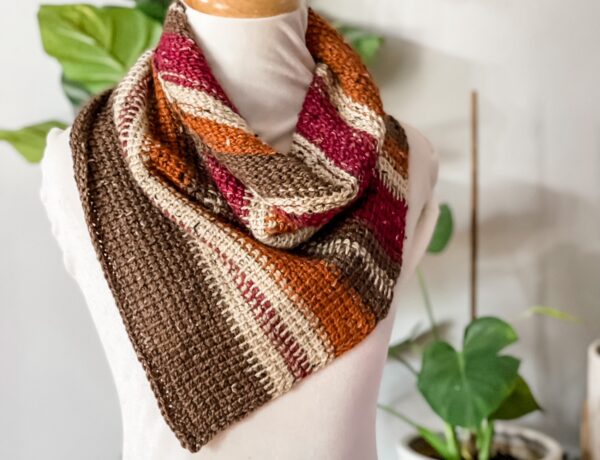
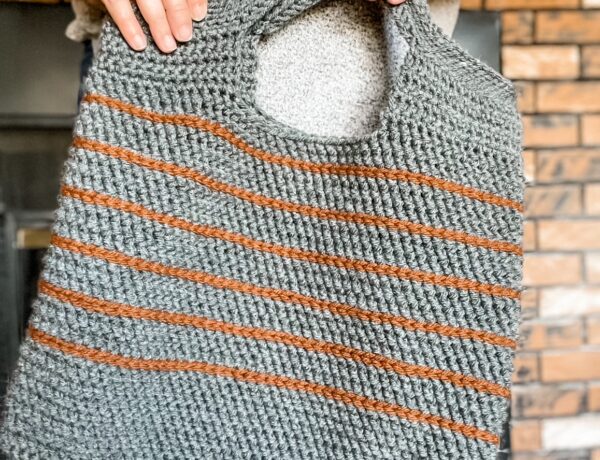
I’ve used the herringbone half double crochet stitch in several projects, most recently the Winfield Tote.
The Yarn
Have you ever used yarn that is so soft, it makes you want to crochet everything with it? That’s how I feel about Wonderfluff from WeCrochet. It’s a bulky, weight 6 yarn but it isn’t heavy like most bulky weight yarns. It’s a baby alpaca, merino, and nylon blend with a really cool construction. The baby alpaca and merino fibers are blown through a tube of nylon mesh, which makes this yarn hold up really well while also being surprising lightweight. It comes in a ton of gorgeous colors. For the Spruce Trail Pullover, I chose to use Hare Heather.

Where to get the Pattern
The full free pattern is below, but you can also pick up ad free PDFs in my Ravelry and Etsy shops. The sale of these PDFs helps me continue to provide free content for you here, on my blog.
I’d love to see and share your work! Tag me on social media @hookedhazel or share photos of your WIPs with the hashtag #sprucetrailpullover
You might also like…
If you like the Spruce Trail Pullover, you might like some of these other free sweater patterns, below.
Classic Tunisian Pullover
Hi friends! I am so excited to finally share with you this new Tunisian…
September 26, 2020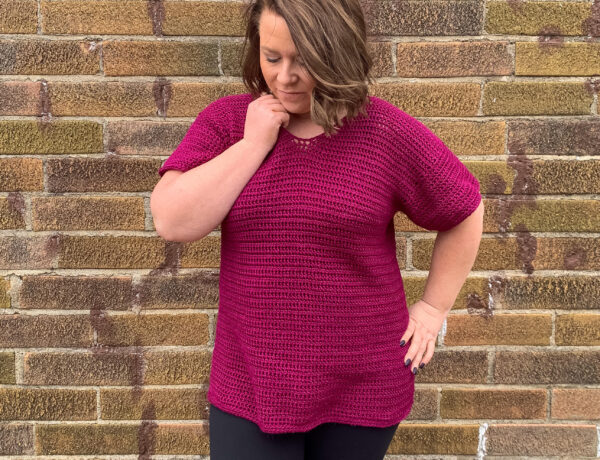
Ollie Tunic – Free Crochet Pattern
February is coming to a close, and that means I’m looking forward to spring.…
February 25, 2021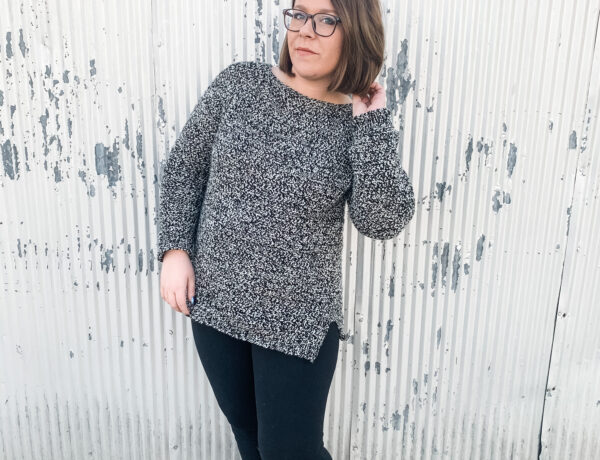
Crochet Raglan Sweater – Free Pattern
One of my favorite things to make is simple crochet sweaters that are beginner…
March 7, 2021Materials Needed
- 900 (970, 1100, 1235, 1330, 1450, 1560, 1675, 1790, 1910) yards of Wonderfluff OR a comparable bulky weight yarn.
- US J/6mm crochet hook or size needed to meet gauge. I like these hooks from WeCrochet.
- Locking stitch marker
- Scissors
- Darning Needle
- Blocking supplies
Abbreviations
ch – chain
slst – slip stitch
hhdc – herringbone half double crochet
fhdc – foundation half double crochet
blo – back loop only
2tog – work 2 sts together
RS – right side
WS – wrong side
Notes
- Pattern is worked in two panels, which are then seamed together. Finishing is worked in the round after seaming.
- Front and back panels are worked side to side.
- Sleeves are worked in the round, attached to the body.
- Pattern is written for sizes XS (S, M, L, XL, 2X, 3X, 4X, 5X).
- Stitch counts are indicated in < > where there is a change.
- Finished bust measurements are 32 (36, 40, 44, 48, 52, 56, 60, 64)
- Choose a size with 2 – 4″ of positive ease.
- Ch 1 at the end of a row does not count as a st.
Gauge
12 sts x 9 rows = 4″ in hhdc
Measurements
Bust: 32 (36, 40, 44, 48, 52, 56, 60, 64)”
Length: 23 (24, 24, 25, 26, 26, 26, 26 26)”
Pattern
Back Panel:
Row 1 (RS): Fhdc 62 (64, 64, 66, 66, 68, 68, 68, 68), ch 1, turn. <62, 64, 64, 66, 66, 68, 68, 68, 68>
Row 2 (WS): Hhdc in each st across, ch 1, turn.
Rows 3 – 38 (42, 46, 52, 56, 60, 64, 68, 72): Repeat row 2. Fasten off.
Left Side of Front Panel:
Row 1 (RS): Fhdc 62 (64, 64, 66, 66, 68, 68, 68, 68), ch 1, turn. <62, 64, 64, 66, 66, 68, 68, 68, 68>
Row 2 (WS): Hhdc in each st across, ch 1, turn.
Rows 3 – 11 (13, 13, 15, 15, 17, 19, 19, 21): Repeat row 2. Do not fasten off.
Neckline Decreases:
Row 1: Slst 8 (8, 8, 9, 9, 8, 8, 8, 8), hhdc 1, hhdc2tog, hhdc to end of row, ch 1, turn. <53, 55, 55, 56, 56, 59, 59, 59, 59 hhdc>
Row 2: Hhdc until 3 sts remain, hhdc2tog, hhdc 1, ch 1, turn. <52, 54, 54, 55, 55, 58, 58, 58, 58>
Row 3: Hhdc 1, hhdc2tog, hhdc to end of row, ch 1, turn. <51, 53, 53, 54, 54, 57, 57, 57, 57>
Rows 4 – 7 (7, 9, 11, 13, 13, 13, 15, 15): Repeat rows 2 – 3. <47, 49, 47, 46, 44, 47, 47, 45, 45>
Sizes XS, S, M Only:
Rows 8 (8, 10) – 9 (9, 11): Hhdc in each st across, ch 1, turn.
Neckline Increases:
Row 1: Hhdc until 2 sts remain, 2hhdc in next st, hhdc 1, ch 1, turn. <48, 50, 48, 47, 45, 48, 48, 46, 46>
Row 2: Hhdc 1, 2hhdc in next st, hhdc to end of row, ch 1, turn. <49, 51, 49, 48, 46, 49, 49, 47, 47>
Rows 3 – 6 (6, 8, 10, 12, 12, 12, 14, 14): Repeat rows 1 – 2. <53, 55, 55, 56, 56, 59, 59, 59, 59>
Row 7 (7, 9, 11, 13, 13, 13, 15, 15): Hhdc until 2 sts remain, 2hhdc in next st, hhdc 1, ch 9 (9, 9, 10, 10, 9, 9, 9, 9), turn. <53, 55, 55, 56, 56, 59, 59, 59, 59 hhdc>
Right Side of Front Panel:
Row 1: Hhdc in 2nd ch from hook, hhdc in each st across, ch 1, turn. <62, 64, 64, 66, 66, 68, 68, 68, 68>
Rows 2 – 11 (13, 13, 15, 15, 17, 19, 19, 21): Repeat row 1.
Fasten off.
Seaming:
Lay your panels with the front panel on top of the other so that they are aligned, with right sides facing in.
Seam shoulders using your preferred seaming method. Then, beginning from the bottom, sew together each side, leaving 16 (16, 18, 19, 21, 24, 25, 28, 28 ) sts on each panel unseamed. This will create the arm holes.
Sleeves:
Join yarn in underarm, at the first unseamed row of the back panel. Ch 1.
Round 1 (RS): Hhdc in each st around, join with slst to first st, ch 1, turn. <32, 32, 36, 38, 42, 48, 50, 56, 56>
Rounds 2 – 3: Hhdc in each st around, join with slst to first st, ch 1, turn.
Round 4: Hhdc 1, hhdc2tog, hhdc until 3 sts remain, hhdc2tog, hhdc 1, join with slst to first st, ch 1, turn. <30, 30, 34, 36, 40, 46, 48, 54, 54>
Rounds 5 – 10 (10, 10, 13, 16, 19, 22, 25, 25): Repeat rounds 2 – 4. <26, 26, 30, 30, 32, 36, 36, 40, 40>
Rounds 11 (11, 11, 14, 17, 20, 23, 26, 26) – 34: Repeat round 2.
Ribbing:
With yarn still attached, ch an additional 9 sts for a total of 10 ch.
Row 1: Sc blo in 2nd ch from hook and each ch across, slst in next two sts of sleeve, ch 1, turn. <9 sc>
Row 2: Sk 2 slst, sc blo in each st across, ch 1, turn. <9 sc>
Row 3: Sc blo in each st across, slst in next two sts of sleeve, ch 1, turn.
Rows 4 – 26 (26, 30, 30, 32, 36, 36, 40, 40): Repeat rows 2 – 3.
Join first and last rows with slst on the wrong side of your cuff.
Fasten off, repeat for the opposite sleeve.
Bottom Ribbing:
Join yarn at bottom edge at either side seam, ch 10.
Row 1: Sc blo in 2nd ch from hook and each ch across, slst in next two row ends, ch 1, turn. <9 sc>
Row 2: Sk 2 slst, sc blo in each st across, ch 1, turn. <9 sc>
Row 3: Sc blo in each st across, slst in next two row ends, ch 1, turn.
Rows 4 – 76 (84, 92, 104, 112, 120, 128, 136, 144): Repeat rows 2 – 3.
Join first and last rows with slst on the wrong side of your ribbing.
Fasten off.
Neckline:
With the back RS facing you, join yarn at right shoulder seam in the neck hole. Ch 1.
Round 1: Sc evenly in each st across, sc evenly around the neckline, do not join. Please note that exact number of sts is not crucial here.
Round 2 – 5: Slst blo in each st around.
Fasten off.
Weave in all ends.