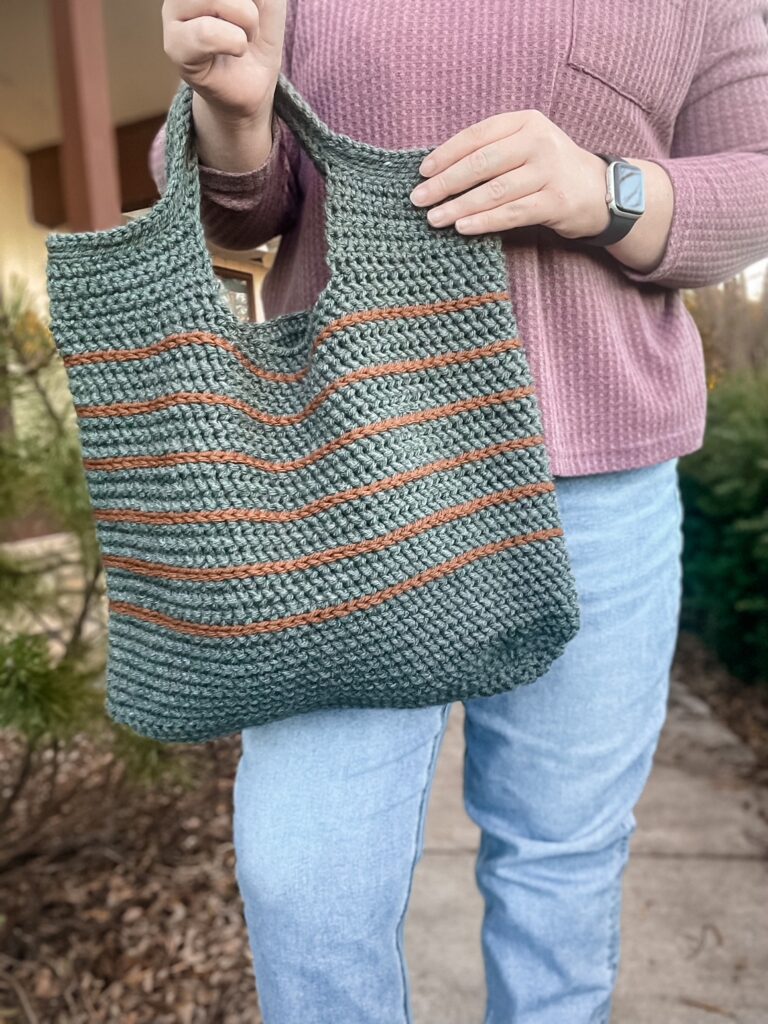
One of my favorite things to crochet is bags. They are utilitarian, you can experiment easily with new stitches, and they make great gifts. Plus they’re fast to make, and sometimes you just need a fast project, right? The Winfield Tote checks all those boxes. It’s a sturdy bag that uses bulky yarn and fun surface slip stitch to add a striping detail. You can customize the stripes however you like, using scrap yarn or different colors. My testers really had fun with this, and you can see the different ways they striped their bags by searching the hashtag #winfieldtote.
How to Surface Slip Stitch
If you’ve never used the surface slip stitch, don’t be afraid! They are quite easy, and I’ve even made a short tutorial video for them, below.
I love how the surface stitches add a pop of texture and color, don’t you? The options with the technique are really endless. I’ve seen people add letters or other shapes to projects using this method. The only limit is your imagination!
The Yarn
For this project I used one of my all time favorites – Brava Bulky from WeCrochet. If you’ve been following me for awhile, you know I regularly sing the praises of the Brava yarn line. I love it because it comes in so many colors, is machine washable, super affordable, and holds up to a TON of use. Seriously, when I want to use acrylic in a project, I usually go with one of the Brava yarns. For this tote I used the colorways Charcoal Heather and Brindle.
The Pattern
The full free pattern is below, but as always, you can also find the low cost, ad free PDF in my Ravelry and Etsy shops at the links below.
Diamond Grid Wrap – Free Crochet Shawl Pattern
Wow – it’s been a minute since I posted a free pattern! It has…
July 6, 2022
Stitch A Thon Square 5
When I need a comfort project, I always gravitate towards making a blanket. Blankets…
May 11, 2022
Free Tunisian Crochet Spring Sweater Pattern
I love playing around with new to me stitches and making little swatches. Is…
March 23, 2022Materials & Notions:
WeCrochet Brava Bulky, 100% acrylic, 136 yards/ball 2 colors
- Charcoal Heather – 420 yards
- Brindle – 30 yards
5.0 (US H) and 5.5 (US I) mm crochet hooks, or sizes needed to make gauge
Locking stitch markers (2)
Scissors
Darning needle
Gauge:
12 sts x 9 rows = 4” in hhdc with larger hook
Abbreviations
ch – chain
st(s) – stitch(es)
sl st – slip stitch
sc – single crochet
hdc – half double crochet
hhdc – herringbone half double crochet
fsc – foundation sc
fhdc – foundation half double crochet
blo – back loop only
mc – main color
cc – contrast color
sm – stitch marker
Measurements
16” x 16”
Notes:
- Ch 1 does not count as a st.
- The bag is worked completely in mc, with only the finishing surface sl st worked in your cc.
- After round 1 of your base, you should have a total of 68 sts; 1 marked st at each end with 33 sts between your sm.
- The body of the bag and handles are worked in continuous rounds.
- Due to the continuous rounds of the body, your surface sl st will have a jog where you join. I recommend beginning them on the sides or back of your bag if you do not want them to show.
- You may customize your surface slip stitch striping, I have provided row counts where I added them, but feel free to add more or less; or to only stripe a certain section of the bag. This is a method you can use to make your tote truly one of a kind!
- For a tutorial of hhdc, watch this video: https://www.instagram.com/p/CV5Q1mNAOY_/
- For a tutorial of surface sl st, watch this video: https://www.instagram.com/p/CV_HrV2gVNP/
Base of bag:
With smaller hook,
Round 1: Fhdc 35, place sm in last st, rotate work and hdc into the ch edge of your next 33 foundation sts, place sm in first st of round, join with sl st to first st, ch 1, turn. <68>
Round 2: *Hdc to each st until you reach your sm, 3hdc in marked st, place marker in center st of these 3*, repeat from * to * one more time, join with sl st to first st, ch 1, turn . <72>
Round 3 : *Hdc to each st until you reach your sm, 3hdc in marked st, place marker in center st of these 3*, repeat from * to * one more time, hdc in remaining sts, join with sl st to first st, ch 1, turn . <76>
Rounds 4 – 7: Repeat round 3. <92>
Switch to the larger hook, remove sm and now use one to mark the end of each round, moving it as you complete rounds.
Body of bag:
Rounds 1 – 25: Hhdc in each st around. <92>
Row 26: Hhdc remaining sts over to the side of the bag, join with a slst to the next st, and fasten off.
Lay your bag flat, determine the sts on either side that are the closest to being the end sts. You want to divide your bag into two even sides of 46 sts each. Beginning on the left front side of your bag, counting out from the first st of the front, mark the 15th st. Do the same on the back of the bag.
Upper body of bag:
With the right side facing you, join yarn in either marked st, ch 1. You will be working in rows across 30 sts, leaving the center 16 sts on either side unworked to create the handle opening.
Row 1: Sc 30, ch 1, turn. <30>
Rows 2 – 5: Repeat row 1.
Row 6: Sc 30, fasten off.
With the right side facing you, join yarn in the opposite st marker and work as you did the previous side.
Row 1: Sc 30, ch 1, turn. <30>
Rows 2 – 5: Repeat row 1.
Row 6: Sc 30.
Do NOT fasten off.
Handles:
Round 1: Sc 30, fsc 26, sc 30, fsc 26, turn. <112>
Rounds 2 – 5: Sl st blo.
Join with sl st to first st, fasten off.
Weave in all ends.
Stripes:
With larger hook and your cc, surface slst stripes in between the following round counts of the body:
Rounds 8 & 9, 11 & 12, 14 & 15, 17 & 18, 20 & 21, 23 & 24.
Weave in all ends.